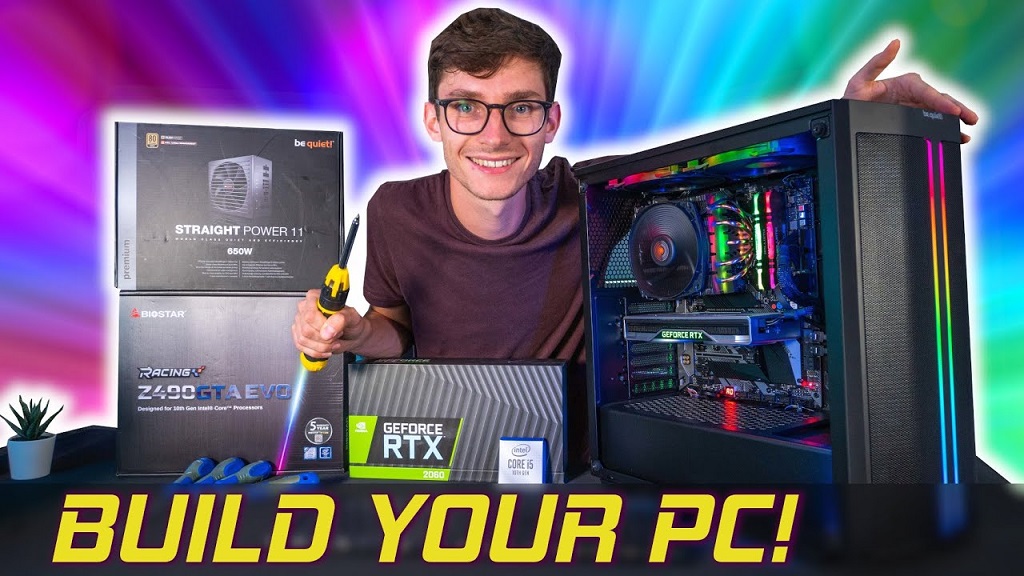
27 Feb Building a Gaming PC Step by Step: Expert Guide
Building a gaming PC step by step requires careful assembly of components like the CPU, motherboard, RAM, and GPU, followed by cable management and software installation. Building a gaming PC allows you to customize your system to achieve the best performance for your budget and needs.
It’s a rewarding experience that can save you money compared to buying a pre-built system and also provides a deeper understanding of your computer’s capabilities. To build one, you’ll need components like a CPU, motherboard, GPU, RAM, storage, power supply, and a case, along with necessary tools and accessories.
With the right guidance and attention to detail, the process can be both enjoyable and empowering.
Choosing The Right Components

When building a gaming PC, one of the crucial steps is choosing the right components. Each component plays a key role in the performance and capabilities of the system. From the motherboard to the graphics card, every part needs to be carefully selected to ensure an optimal gaming experience. A critical but often overlooked component is the power supply unit (PSU). Selecting a PSU that meets your system’s power requirements is vital for stability and efficiency. To aid in this selection, referring to resources like the Linus tech tips PSU tier list can be incredibly valuable. This list evaluates PSUs based on their performance, reliability, and features, helping you choose a power supply that can support your gaming PC effectively. Here’s a step-by-step guide to help you make informed decisions when choosing the components for your gaming PC, ensuring that every piece, including the PSU, contributes to a superior gaming setup.
Selecting The Motherboard
Selecting the right motherboard is essential as it determines the compatibility of other components. When choosing a motherboard, consider factors such as the socket type for the CPU, RAM compatibility, expansion slots for future upgrades, and the number of USB and SATA ports. It’s important to choose a motherboard that meets your specific requirements and supports the features you desire for your gaming PC.
Choosing The Central Processing Unit (CPU)
The CPU is the brain of your gaming PC. When selecting a CPU, consider factors such as the number of cores, clock speed, cache size, and thermal design power (TDP). Additionally, ensure compatibility with the chosen motherboard and consider future upgrade options. It’s crucial to strike a balance between performance and budget when choosing the CPU for your gaming PC.
Selecting Computer Memory (RAM)
RAM plays a critical role in gaming performance, affecting multitasking and overall system responsiveness. When selecting RAM for your gaming PC, consider factors such as capacity, speed, and latency. Ensure that the chosen RAM is compatible with the motherboard and meets the system requirements of the games you intend to play. Additionally, consider future expansion options to accommodate evolving gaming needs.
Picking The Graphics Card (GPU)
The GPU is a fundamental component for gaming PCs, directly impacting frame rates and visual quality. When choosing a graphics card, consider factors such as VRAM capacity, core clock speed, cooling solutions, and form factor. Ensure compatibility with the motherboard and power supply, and consider the specific gaming performance requirements for your favorite games. It’s essential to choose a GPU that aligns with your gaming preferences and offers the desired level of graphical performance.
Assembling Your PC
Now that you have all the necessary components for your gaming PC, it’s time to start assembling your masterpiece. In this step-by-step guide, we will walk you through the process of building your gaming PC from scratch. Let’s get started!
Preparing The Case And Motherboard
The first step in assembling your PC is to prepare the case and motherboard. Start by removing the side panel of the case and laying it down on a flat surface. Then, carefully place the motherboard inside the case, making sure to align the screw holes with the standoffs. Secure the motherboard in place by screwing it down using the provided screws.
Installing The CPU And CPU Cooler
Next, it’s time to install the CPU and CPU cooler. Start by lifting the lever on the CPU socket to open it. Gently place the CPU into the socket, making sure to align the gold triangle on the CPU with the triangle on the socket. Once the CPU is in place, lower the lever to lock it in position. Then, apply a small amount of thermal paste onto the CPU, followed by attaching the CPU cooler on top.
Mounting RAM and Storage Devices
After installing the CPU, it’s time to mount the RAM and storage devices. Locate the RAM slots on the motherboard and insert the RAM sticks, making sure to firmly push them into place until they click. For storage devices such as SSDs or HDDs, locate the drive bays in the case and secure the devices using screws or trays, depending on the case and storage device type.
Attaching The Graphics Card And Power Supply
The final steps in assembling your PC are attaching the graphics card and power supply. Carefully insert the graphics card into the PCI-E slot on the motherboard, making sure it is securely seated. Then, connect the power cables from the power supply to the necessary ports on the motherboard and graphics card. Finally, connect the power supply to a power source and press the power button to turn on your newly built gaming PC!
Software Installation And Setup
When it comes to building a gaming PC, the Software Installation and Setup is a crucial step that ensures your system runs smoothly. This section focuses on installing the necessary software, configuring BIOS settings, and testing your build to ensure optimal performance.
Installing Operating System And Drivers
- Install an Operating System such as Windows or Linux on your newly built gaming PC.
- Download and install the latest drivers for your motherboard, graphics card, and other components.
- Ensure that all drivers are up-to-date to maximize performance and compatibility.
Configuring Bios Settings
- Access the BIOS by pressing the designated key during system startup (usually Del or F2).
- Configure settings such as boot order, RAM frequency, and CPU settings for optimal performance.
- Save changes before exiting the BIOS to apply the configurations.
Setup And Testing Of The Build
- Power on your gaming PC and ensure all components are functioning correctly.
- Check for any hardware issues or errors during the initial setup.
- Test the performance of your build by running benchmarks and stress tests.
Cable Management And Final Touches
When building a gaming PC, cable management plays a crucial role in not only improving aesthetics but also enhancing airflow and cooling efficiency. Proper cable management ensures a clean and organized interior, optimizing the overall performance of your PC.
Organizing Internal Cables
Start by organizing internal cables neatly to avoid clutter and interference with other components. Use cable ties or Velcro straps to secure cables along designated routes within the case. Ensure that cables are not obstructing airflow or touching any moving parts.
Optimizing Airflow And Cooling
Optimizing airflow and cooling is essential for maintaining optimal temperatures and preventing overheating of your components. Position case fans strategically to promote airflow throughout the case, directing cool air towards critical components such as the CPU and GPU.
Adding Led Lights And Customization
For adding LED lights and customization, consider installing RGB strips or LED fans to enhance the visual appeal of your gaming PC. Customizing the lighting can create a personalized and immersive gaming experience while showcasing your unique style.
Cost Comparison And Pre-built Vs. Custom Pc
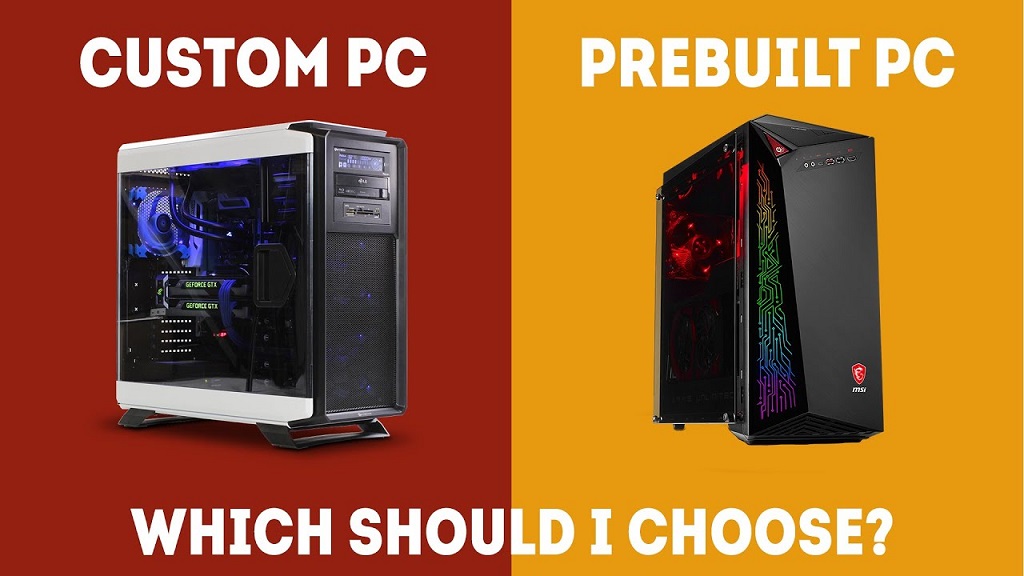
When it comes to building a gaming PC, one of the first decisions you’ll face is whether to go for a pre-built system or build your custom PC. Both options have their advantages and drawbacks, and it’s important to consider factors such as cost, customization, and performance before making a decision. In this section, we’ll take an in-depth look at the pros and cons of both options, as well as analyze the cost difference between building and buying a gaming PC.
Pros And Cons Of Building Your Pc
Building a gaming PC from scratch gives you ultimate control over the components you choose and allows for complete customization. Here are some of the key benefits and drawbacks of building your PC:
- Pros:
- Full customization and control over components
- Potential for higher performance and future upgrades
- Opportunity to learn about computer hardware and gain technical skills
- Potential cost savings
- Cons:
- Requires research and knowledge about compatible hardware
- Takes time and effort to assemble and troubleshoot
- No customer support or warranty for individual components
- May be overwhelming for beginners
Benefits And Drawbacks Of Pre-built Gaming Pcs
On the other hand, pre-built gaming PCs offer convenience and simplicity. Here are some of the main benefits and drawbacks of choosing a pre-built system:
- Benefits:
- Ready-to-use out of the box
- Customer support and warranty for the entire system
- No need to research and select individual components
- A great option for those with limited technical knowledge
- Drawbacks:
- Less customization and limited upgrade options
- Potential for higher cost compared to building your PC
- May not come with the latest hardware or features
- Less control over component quality
Cost Analysis: Building Vs. Buying
Now let’s dig into the cost aspect of building versus buying a gaming PC. While building your PC can potentially save you money, it’s important to consider the overall costs involved. Here’s a breakdown of the cost comparison:
| Building a PC | Buying a Pre-built PC | |
| Component Costs | Varies depending on your component choices and deals available | Included in the overall system cost |
| Assembly | Free if you build it yourself | Included in the overall system cost |
| Customer Support and Warranty | Depends on individual component warranties | Typically included with the pre-built system |
| Software and Operating System | Additional cost for Windows or other operating system | Usually included |
| Total Cost | Component costs + assembly + software | Overall system cost |
While building a PC may seem cheaper initially, it’s crucial to factor in the cost of individual components, assembly time, and the need for an operating system. On the other hand, buying a pre-built PC provides the convenience of a complete package, but may come at a higher price. Ultimately, the decision between building and buying a gaming PC depends on your budget, level of technical expertise, and desire for customization.
Frequently Asked Questions For Building A Gaming Pc Step By Step
Is It Cheaper To Build A Gaming PC or Buy One?
Building a gaming PC is generally cheaper than buying one already assembled.
What Are The Steps To Build A Gaming Pc?
To build a gaming PC, follow these steps: Choose components, assemble them inside the case, connect cables, and install the operating system and drivers.
How Much Does It Cost To Build A Gaming Pc?
Building a gaming PC can cost anywhere from $500 to over $3000 depending on the desired specifications.
What Is The First Thing To Buy When Building A Gaming Pc?
The first thing to buy when building a gaming PC is the central processing unit (CPU).
Conclusion
Building a gaming PC step by step requires careful consideration and attention to detail. From choosing the right motherboard to installing the CPU, RAM, and SSD, each component plays a crucial role in the overall performance. TOP PCs WITH HD WEBCAM not only deliver stunning visual clarity for seamless video communication but also prioritize a smooth and efficient gaming experience through meticulous cable management and proper installation techniques..
By following this comprehensive guide, you can confidently build your gaming PC and enjoy the thrill of high-quality gaming. Start your gaming journey and unleash the full potential of your gaming experience!
No Comments