03 Jan 10 tips to improve your video editing quality
The first time I saw my father’s video editing. He edited while I played with my Scalextric under the dining room table. He listened as the tapes of his camera went back and forth, repeating the same fragment and the same song. Until one day we decided to record with my toy treasure island and that’s when it all started.
Be Aware Of The Video Characteristics That Your Camera Has

Take a look at the instruction manual to know in what format your camera records, resolution, and frames. This is essential because when editing you will need to know it to correctly configure your editing project in the program you use. If you have doubts, you can see this other post that we publish in CasanovaFotoBlog.
If you use the Adobe Premiere program you will not have much problem because it detects the metadata in which you have recorded a video. And if you have configured it wrong, it will alert you and ask you if you want to change it or keep it as is.
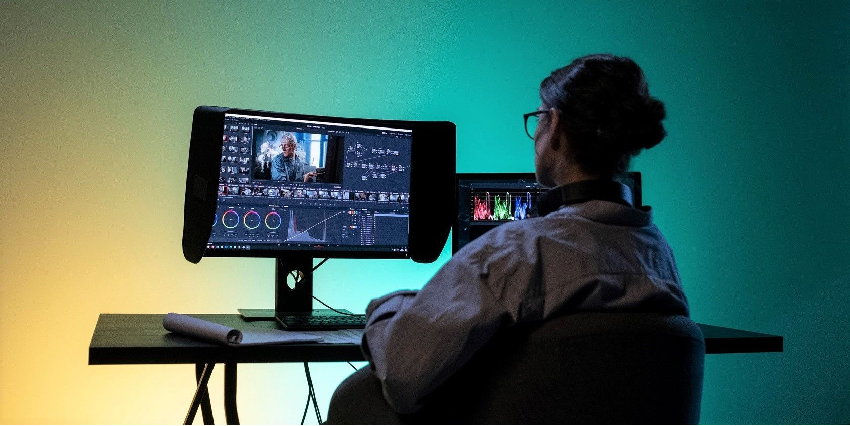
Make Sure You Have The Right Computer Equipment
Video editing requires a lot of power from our computer. If you already have one, check its features in case you need any expansion. If you are going to buy a new one, do it thinking especially about the edition.
And also think about some hard drives to store all the material, the video takes up a lot.
Once you have finished editing, keep the final video and delete the gross ones (I insist, delete the gross ones, the world is not going to end, really).
Recommended Features for FullHD and 4K
- Intel i7 Xeon processor
- RAM 16-32Gb
- SSD hard drive for OS and RAID HDD 7200rpm programs to store data
- NVidia graphics allows the program to take advantage of multiple GPUs
Get Familiar With The Vocabulary Related To Video Editing
Expressions
- Viewing / Raw material
- Continuity / Raccord
- Inner rhythm (don’t fall in love with blueprints)
- Distort
- Air
- “We fix it postponed …”
Technicalities
- Project / Sequence / Final assembly
- Import / Process / Export
- Grading
- Framing / Shot / Focus
- Resolution / Frames
Find A Program That You Feel Comfortable With
In my case, I started with Pinnacle and Ulead Video Studio. In my career I learned how to use AVID, I also tried Final Cut, Premiere, and Sony Vegas.
I have stayed with Adobe Premiere because when I tried it, it was the one that seemed most intuitive to use and the one that gave me the least problems when importing different formats.
I recently tried Premiere Elements and found it to be a good tool for amateur and professional editing.
The free and basic ones like Movie Maker or iMovie seem very limited to me, but to start I recommend trying them.
Soak up the instruction manual
When you find a program that you feel comfortable with, soak up the instruction manual for it. Yes, yes, as is, study it (even if it has 300 pages). And, if you have any doubts, sign up for a course.
You have to be patient and practice to infinity and beyond with personal projects where you can go wrong.
Find Another Program To Edit Color And Audio
Programs for video editing are specially prepared for video, but not for retouching the color or making deep audio adjustments, so if you have to adjust the audio, it is better to do it with a program designed for that.
I have tried Audacity, which is free, Soundbooth, and Adobe Audition. All three work fine, but in the end, I stuck with Audacity for its intuitive interface.
As for color retouching, so far little could be done with Premiere, so I tried SpeedGrade and After Effects. Now that Premiere has new color retouching features, I prefer it. Although, as I always tell you, try to solve these issues during recording and do not leave it for editing, both in video and audio.
Be Proactive
When you are recording, do the white balance correctly, frame, focus well, and think about leaving enough air to avoid clipping afterward, that is, leave enough margin without cutting heads, for example.
Also, think about recording a few seconds before and after each take to ease in and out points when editing or applying transitions.
Order The Material
As I have told you to erase the raw material once you have finished, while you are using it and you need it, keep it well stored and organized in folders by projects.
Why? To avoid scares. If you start video editing and during editing, you change the gross places, the program will not know how to find them and a warning screen of orphaned files will appear and what you have edited will disappear. It has a solution, you simply have to tell the program the new place of the brutes and that’s it, but hey, you can save yourself all that trouble.
In addition to the gross ones, I also usually save the music I use, photos, effects, etc. in the same folder. Once the editing is finished and the video is exported, you can change the location of the raw files or delete them, but remember that you will no longer be able to make any further modifications to the final project without those files.
Slowly And With Good Handwriting
Before exporting the final video, review the editing very well so that you do not have any errors. Depending on the length of the video and the retouching, the export may take a short time or a long time. And when I say a lot I mean more than 2 hours, quietly.
Therefore, make sure that the edition is completely correct and in what format you are going to export. I recommend that you export in H.264 format with the setting that interests you the most. Premiere has a list of very useful options specifically designed according to where we will hang the video, such as YouTube and its different resolutions. Try to export according to the characteristics which you have recorded. The more you compress, the longer the export will take.
Don’t Make Plans When You Have To Edit
Editing a video takes time, even if it doesn’t seem like it. The approximate calculation that I do, and that works for me, is that one minute of edited video equals one hour of editing in real-time. That is, if you are going to edit a three-minute video, at a good pace and without counting the color retouching, effects, titles, etc., it will take approximately 3 hours.
You may also be interested in THE NEW SOCIAL NETWORKS AND THEIR IMPACT ON COMPANIES
No Comments